How to Use D-ID: The Ultimate Guide to AI Video Generation (Studio & API)
In the high-stakes world of digital marketing, speed is everything. Learning how to use D-ID isn’t just a technical skill; it’s a survival tactic for creators facing immense performance pressure to produce video content at scale.
We aren’t just talking about another video editor. D-ID allows you to automate facial animation, turning static text or audio into professional presenters in minutes.
In this AI Avatar Generator guide, we will break down the exact workflows for both the Creative Reality Studio (for creators) and the API (for developers). By the end, you will know exactly how to transform a single photo into a speaking avatar.
Table of Contents
Getting Started: What Is D-ID and Who Is It For?
D-ID is an AI video generator platform that specializes in deep learning facial animation. Unlike Synthesia which focuses on corporate avatars, D-ID excels at Photo Animation, bringing still images to life.
Our testing confirms that D-ID primarily serves three groups: Marketers needing quick social content, Creators making character-driven videos, and Developers automating workflows via API.
You can access the platform through two main gateways: the Creative Reality Studio (a visual dashboard) and the API (for code-based generation). Both share the same underlying credit system.
Before we dive into the tutorial, here are the key use cases where D-ID shines:
Social Media Content: Create speaking influencers or mascots.
E-learning Modules: Turn text courseware into engaging video lessons.
Personalized Marketing: Send video emails addressing clients by name.
Step-by-Step Guide: Using D-ID Creative Reality Studio
This section is your battle-tested walkthrough for the Creative Reality Studio. We have stripped away the fluff to focus on the actual logic of the dashboard.
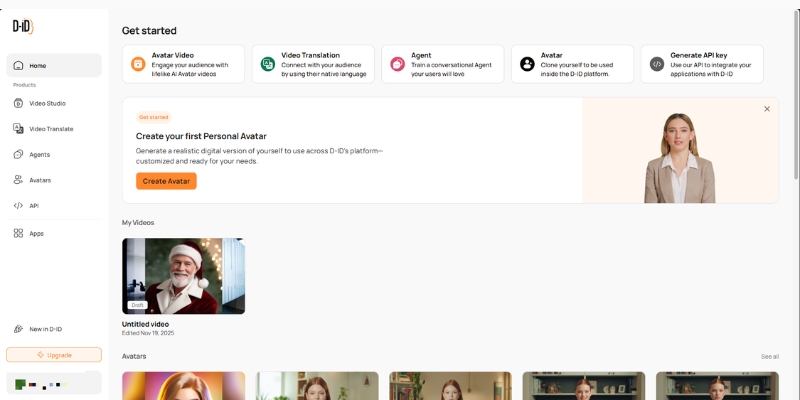
Step 1: Account Setup & Dashboard Navigation
First, head to the D-ID website and sign up for a free trial. Once logged in, locate the purple “Create Video” button on the left sidebar. This initializes the studio interface.
Step 2: Choosing Your Presenter
You have three options here. You can select a standard HQ Avatar (high fidelity), generate a new AI face using a text prompt, or click “Add” to upload your own photo. We recommend starting with a standard avatar to test the waters.
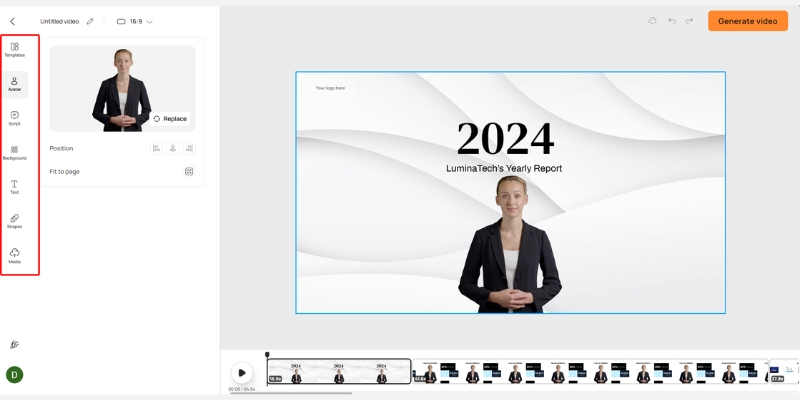
Step 3: Inputting the Script or Audio
On the right panel, you will see the script box. You can type your text directly or use the built-in GPT integration to write it for you. For better lip-sync, we strongly suggest uploading a real human voice recording using the “Audio” tab.
Step 4: Selecting Voice and Language
If you use text-to-speech, browse the voice library. You can filter by language, accent, and style (e.g., “Assistant” or “Cheerful”). Listen to previews to ensure the voice matches the avatar’s appearance.
Step 5: Generation and Export
Click “Generate Video” in the top right. A popup will show the credit cost (usually 1 credit per 15 seconds). Confirm the action, wait for the rendering to finish, and then download your MP4 file.
How to Use D-ID to Animate Static Photos (Custom Avatar)
The most unique feature of D-ID is Photo Animation. This allows you to upload a photo of an ancestor, a historical figure, or a custom mascot and make them speak.
Preparing Your Image
The AI works best with a front-facing photo. Ensure the subject has their mouth closed and eyes open. Avoid images where hands or objects cover parts of the face, as this confuses the animation algorithm.
Uploading to the Studio
In the “Choose a Presenter” section, click the circular “Add” button. Select your prepared JPEG or PNG file. The system will process the face and add it to your library.
Fine-Tuning the Animation
Once uploaded, select your custom face. Note that the head movement range is limited compared to 3D avatars. It works best for “talking head” videos where the focus is on the message, not complex body language.
D-ID API Tutorial: A Workflow for Developers
For developers building apps, the D-ID API offers a robust way to integrate video generation programmatically. Here is the logical flow you need to implement.
Authentication
First, get your API Key from the “Settings” > “API Key” section of your account. You will use Basic Authentication (combining your API key with your password/secret) for all requests.
Creating a Talk (POST Request)
Send a POST request to the /talks endpoint. You must provide a `source_url` (link to your avatar image) and the `script` (text or audio URL). This initiates the render process.
Retrieving the Result (GET Request)
Video generation is asynchronous. The initial response gives you an ID. You must poll the /talks/{id} endpoint until the status returns “done”. The response will then contain the `result_url` (your video).
Stream API
For real-time applications like AI chatbots, investigate the “Streams” endpoint. This establishes a WebRTC connection, allowing for low-latency video streaming ideal for conversational interfaces.
Integrating D-ID with Canva for Social Media Content
If you design in Canva, you don’t need to switch tabs. D-ID has a native app integration that streamlines the workflow for creators.
Installing the D-ID App in Canva
Open any Canva design and click “Apps” on the left sidebar. Search for “D-ID AI Presenters” and click to install it. You will see the familiar D-ID interface load inside Canva.
Connecting Your Account
You will need to log in to your D-ID account within the Canva window. This links your existing credits to the Canva session.
Generating Inside the Design
Select an avatar, type your text, and click generate. The finished video will appear automatically in your “Uploads” folder in Canva, ready to be dragged onto your Instagram Story or presentation slide.
Battle-Tested Tips for Better D-ID Results
After generating hundreds of videos, we have discovered nuances that separate robotic outputs from professional content. Here is our expert advice.
Optimize Audio Quality
The built-in Text-to-Speech is decent, but uploading a pre-recorded voiceover (using ElevenLabs or your own voice) yields significantly better lip-sync results. Clear audio input drives better animation.
Image Selection Strategy
For custom photos, use a “Mid-shot” (shoulders and up). Close-ups can look distorted when the head moves, while full-body shots often lack facial detail. A passport-style framing is ideal.
Script Pacing
If you must use TTS, add punctuation heavily. Commas and periods create natural pauses. You can also use “break” tags (if supported by the specific voice engine) to control the rhythm of the speech.
The Verdict
D-ID is currently the market leader for animating static photos. While HeyGen might offer slightly better 3D avatars, D-ID’s API flexibility and creative “Photo Animation” feature make it indispensable for unique campaigns.
Try D-ID For Free(Disclosure: If you purchase through links on this page, we may earn a small commission at no extra cost to you. This helps us maintain our “battle-tested” reviews.)
D-ID Pricing and Credit System Explained
Understanding the cost is crucial. D-ID operates on a “credit” model, where 1 credit typically equals up to 15 seconds of video generation.
Free Trial: You get a small number of credits (usually 20) to test the tool. However, videos will have a watermark and cannot be used for commercial purposes.
Lite Plan: This entry-level paid plan removes the watermark. It is best for hobbyists who need clean video but don’t require massive volume.
Pro & Advanced Plans: These tiers unlock commercial rights, higher credit limits, and access to premium voices. If you are an agency, you need the commercial license included here.
| Plan | Best For | Key Feature | Action |
|---|---|---|---|
| Trial | Testing | 5 mins video (Watermarked) | Try Free |
| Lite | Hobbyists | No Watermark | View Plan |
| Pro | Creators | Commercial Rights | View Plan |
Frequently Asked Questions About Using D-ID
Is D-ID free to use?
It offers a free trial with limited credits (usually 5 minutes of video). However, these videos are watermarked. To remove the watermark and gain commercial rights, you must upgrade to a paid plan.
Can I use D-ID videos for YouTube monetization?
Yes, but only if you are on the “Pro” plan or higher. The Lite plan is generally for personal use, and the Trial plan definitely does not convey commercial rights.
How does D-ID compare to HeyGen?
D-ID is superior for animating static images (bringing photos to life). HeyGen is generally considered better for realistic, high-fidelity AI avatars that look like real humans.
Does D-ID support multiple languages?
Yes, the platform supports over 100 languages. The lip-sync technology automatically adjusts the mouth movements to match the phonemes of the selected language.
Read More From AI Avatar Generator
Deepen your knowledge about AI video creation with these related guides and comparisons from our expert hub.
- HeyGen vs D-ID: Ease of Use vs. Creative API
- D-ID Review: The Power of the Creative Reality™ Studio
- What Is an AI Avatar? (And How Do They Work?)
last update : 21/11/2025