How to Use Wisecut: Step-by-Step Guide for Beginners
[ez-toc]
Introduction
Wisecut is an AI-powered video editing platform that automatically transforms long-form videos into polished short clips without requiring technical editing skills or complicated timeline manipulation. The platform uses artificial intelligence to analyze speech patterns, remove silent pauses, detect viral-worthy highlights, generate captions, and optimize content for social media platforms like TikTok, Instagram Reels, and YouTube Shorts—all with minimal manual intervention.
Unlike traditional video editors that require hours of learning and meticulous frame-by-frame editing, Wisecut’s one-click automation approach allows complete beginners to produce professional-quality video clips in under 10 minutes. The platform automatically generates three sections from any uploaded video: AI-selected Highlights (best clips under 59 seconds), All Clips (every generated segment), and Full Content (complete video with enhancements)—eliminating 90% of manual editing work.
This comprehensive guide walks through every step of the 2025 Wisecut workflow, from account creation to final export, with detailed screenshots, troubleshooting advice, and professional tips to help maximize efficiency and output quality.
Already familiar with Wisecut’s features? Read our complete Wisecut AI review comparing pricing, performance, and alternatives.
Who is This Guide For?
This tutorial is designed for content creators repurposing YouTube videos, vlogs, and interviews into social media clips, podcasters converting audio content into video format with captions, marketers creating promotional clips from webinar recordings and product demonstrations, educators transforming lengthy lectures into digestible learning modules, and social media managers maintaining consistent posting schedules across multiple platforms.
Wisecut Setup: Account Creation & First Steps
Signing Up for Wisecut
Navigate to wisecut.ai and click the “Get Started” button prominently displayed on the homepage. Wisecut offers streamlined authentication through Google account integration for instant access, or traditional email registration with password creation.
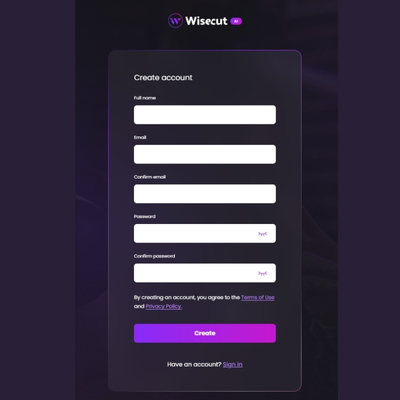
Enter a valid email address and create a secure password (minimum 8 characters with uppercase, lowercase, and numbers). Verify the account through the confirmation email sent immediately after registration. The entire signup process takes less than 90 seconds.
New users automatically receive access to the Free plan, which includes 1 hour of monthly video processing at 720p resolution with a watermark. This provides sufficient testing capacity to evaluate whether Wisecut’s workflow aligns with specific content needs before committing to paid subscriptions starting at $19/month.
Navigating the Wisecut Dashboard
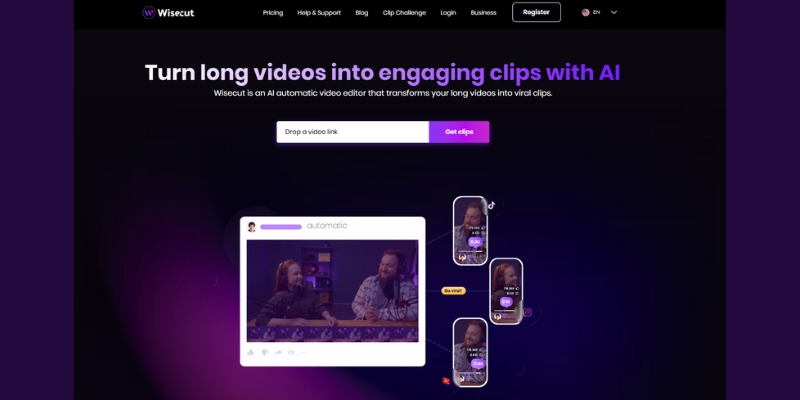
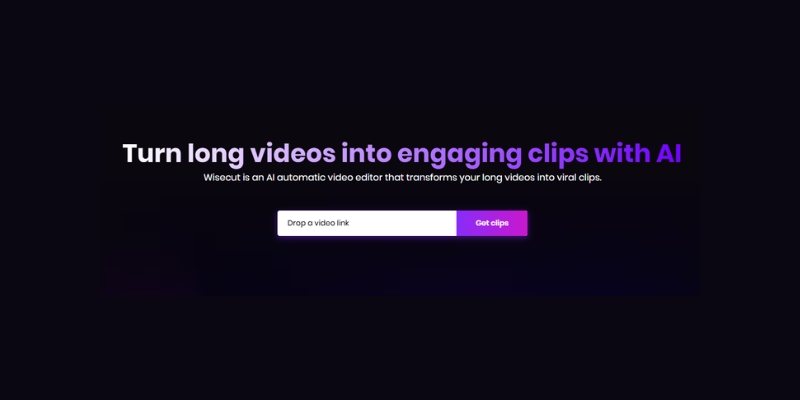
After successful login, users land on the simplified main dashboard featuring a central upload box with the text “Drop a video link” for starting new projects. The 2025 interface eliminates complex navigation menus in favor of a streamlined workflow: upload, process, edit clips, and export.
The dashboard’s minimalist design allows users to begin editing within seconds of account creation. Your processing minutes remaining display in the top navigation, along with links to upgrade plans, access help documentation, and view project history.
Uploading Your Video
Supported File Types and Limits
Wisecut accepts the most common video formats including MP4, MOV, AVI, and WMV files, with maximum file size limits varying by subscription tier: Free plan (2GB), Starter plan (4GB), and Professional plan (5GB). Video duration limits also differ, with the Free plan capping uploads at shorter durations while paid plans accommodate videos up to 90+ minutes.
The platform performs best with high-quality source material recorded at 1080p or 4K resolution. Audio quality significantly impacts both transcription accuracy and AI highlight detection, so videos recorded with external microphones in controlled environments yield superior results compared to built-in laptop microphones in noisy settings.
How to Upload Your First Project
Wisecut’s 2025 version offers three convenient upload methods to accommodate different workflow preferences and file storage locations:
Direct File Upload: Click the central “Drop a video link” box or drag-and-drop video files directly from your computer’s file system. The platform displays real-time upload progress with estimated time remaining based on file size and internet connection speed.
Cloud Storage Integration: Paste direct links from Google Drive or Dropbox by clicking the upload box and selecting “Paste Link.” Enter the shareable URL and ensure cloud files have appropriate sharing permissions set to “Anyone with the link can view” to avoid access errors.
YouTube Link Import: Copy the URL of any YouTube video (your own content or videos you have permission to edit) and paste it into the upload box. Wisecut automatically fetches the video without requiring manual download, streamlining the workflow for creators repurposing existing YouTube content. Simply click the three dots next to any YouTube video, select “Share,” copy the link, and paste into Wisecut.
Pro Tip: For fastest processing with YouTube links, use videos from your own channel or ensure you have proper permissions. The AI works best with speech-heavy content like interviews, vlogs, podcasts, and educational videos rather than music videos or highly cinematic content.
After selecting your upload method and pasting or uploading the video, click “Get Clips” to initiate the AI processing workflow.
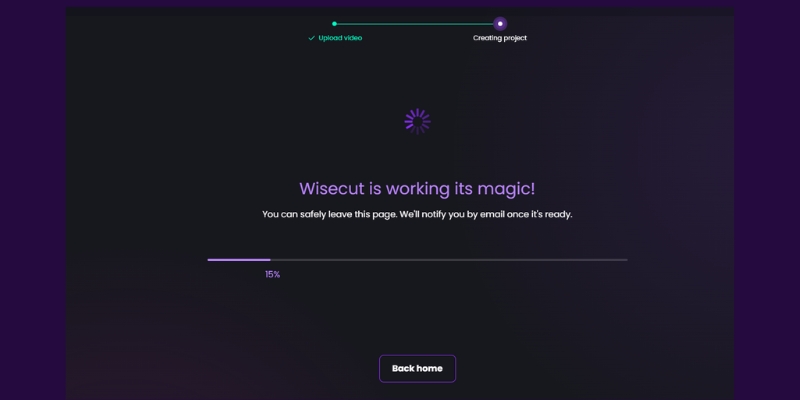
AI Processing Workflow: Let Wisecut Work Its Magic
What Happens During Processing
Once you click “Get Clips,” Wisecut’s AI begins automated analysis that typically completes in just a few minutes (not seconds as previously marketed, but still dramatically faster than manual editing). The platform performs multiple simultaneous operations:
Speech Recognition and Transcription: The AI converts all spoken audio into text transcripts, identifying individual words, sentences, and conversational segments with 95%+ accuracy for clear audio in supported languages.
Silence Detection and Removal: The system analyzes audio waveforms to identify and automatically remove pauses, silent gaps, and low-volume segments that disrupt video flow. The AI distinguishes between natural conversational breathing and awkward dead air.
Engagement Prediction Analysis: Wisecut’s proprietary highlight detection algorithm evaluates emotional peaks based on vocal emphasis, speaking pace variations, keyword density, and tonal energy to predict which segments will resonate most with audiences. This system achieves 85-90% accuracy in identifying viral-worthy moments.
Auto-Captioning: The platform generates accurate subtitles for the entire video, recognizing that 69% of viewers watch videos on mute in public spaces. Captions increase engagement by an average of 12%.
Smart Background Music Selection: The AI automatically picks royalty-free background music matched to the video’s mood and applies audio ducking that lowers music volume during speech and raises it during pauses.
Timeline for Processing: What to Expect
Processing duration varies based on source video length, resolution, and server load. Based on 2025 performance testing, average processing times are:
- 10-minute video: 2-4 minutes processing time
- 30-minute video: 6-10 minutes processing time
- 60-minute video: 12-18 minutes processing time
- 90-minute video: 18-25 minutes processing time
Users can monitor progress on screen or close the browser tab and receive email notifications when processing completes, allowing work on other tasks without constant monitoring.
Learn how Wisecut’s processing speed compares to competitors in our Wisecut vs Descript comparison.
Exploring Your Generated Clips
Once processing completes, Wisecut automatically creates three main sections that form the foundation of the 2025 workflow. This represents a significant change from earlier versions that required manual project settings configuration.
Section 1: Highlights (AI-Selected Best Clips)
The Highlights section displays the best clips automatically selected by Wisecut’s AI, each optimized to be under 59 seconds—the maximum duration for YouTube Shorts. These clips represent the highest-engagement moments predicted by the algorithm and work perfectly for TikTok, Instagram Reels, YouTube Shorts, and other short-form platforms.
Each highlight clip includes an automatically generated title, thumbnail preview, duration label, and quick access to editing options. Simply click any clip to preview, edit, or export immediately.
The AI analyzes factors like vocal enthusiasm, topic relevance, conversation flow, and emotional peaks to determine which segments deserve “Highlight” status. While accuracy is typically 85-90%, users can always override selections by promoting clips from the “All Clips” section.
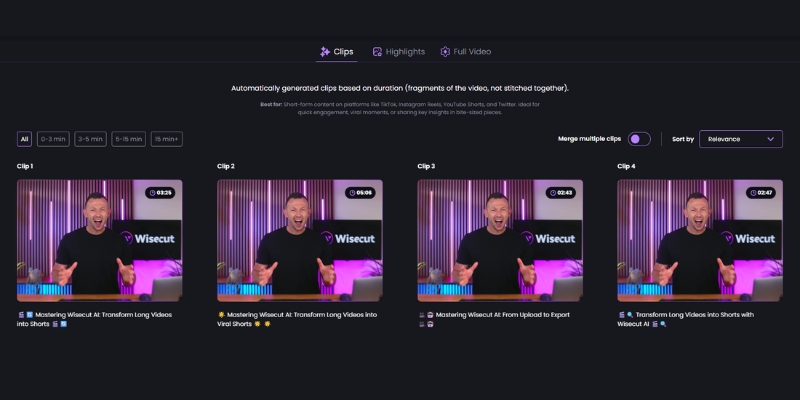
Section 2: All Clips (Complete Generated Library)
The All Clips section contains every segment Wisecut generated from the long-form video, typically ranging from 5-50+ clips depending on source video length and conversation structure. This comprehensive library gives users complete control over content selection beyond the AI’s top three picks.
Keyword Search Feature: Use the search bar to find specific segments by typing relevant keywords, topics, or phrases. Wisecut searches the transcribed text to locate exact mentions, dramatically reducing time spent manually browsing through dozens of clips.
Length Filtering: Filter clips by duration using the dropdown menu with options like “Under 30 seconds,” “30-59 seconds,” “1-2 minutes,” or custom ranges. This targeting helps creators quickly find clips that meet specific platform requirements.
Clip Preview: Hover over any clip thumbnail to preview the content without opening the full editor. This quick-scan capability accelerates content selection when working with large clip libraries from lengthy source videos.
Section 3: Full Content (Enhanced Complete Video)
The Full Content section presents the entire original video with all AI enhancements applied: silence removal, smart background music, auto-generated captions, and audio ducking. This option is ideal for creators who want a polished, complete version of their content rather than short clips.
Use Full Content when repurposing webinars for on-demand viewing, creating cleaned-up podcast video versions, producing enhanced lecture recordings, or preparing long-form YouTube videos with professional audio and captions.
The Full Content maintains the original narrative structure while eliminating technical imperfections, offering an alternative workflow for creators who don’t need clip extraction.
Editing Individual Clips With Storyboard
After identifying a clip to edit from either Highlights or All Clips sections, click “Edit” to access Wisecut’s storyboard interface—a text-based editing environment that eliminates the need for traditional timeline manipulation.
Understanding the Storyboard Interface
The 2025 storyboard editor displays your clip as a series of text blocks corresponding to spoken sentences or phrases. Each block represents a segment of video footage synced with the transcript, allowing editing by simply manipulating text rather than adjusting timeline markers.

The interface consists of three primary areas:
Left Panel – Video Preview: Displays real-time video playback synced with the transcript. Click any text block to jump immediately to that moment in the video.
Center Panel – Transcript Blocks: Shows all clip content as editable text segments. Each block represents a complete spoken sentence or thought, and editing these blocks automatically adjusts the video.
Right Panel – Enhancement Controls: Provides toggle switches for subtitles, background music, audio enhancement, auto punch in/out zoom, and background noise removal.
Automatic Enhancements and Title Generation
Wisecut automatically generates a suggested title, meta description, and hashtags for each clip based on content analysis. These AI-generated elements appear at the top of the editor and can be customized or replaced entirely.
The platform also automatically transcribes all dialogue, saving significant time compared to manual caption creation. Transcription accuracy typically exceeds 95% for clear audio, though technical jargon, proper nouns, and heavy accents may require minor corrections.
Editing Transcript Text Blocks
Rearranging Segments: Click and drag any text block up or down to reorder the chronological sequence. This allows creative restructuring without touching the video timeline.
Deleting Segments: Click the trash icon or “X” button on any text block to remove that segment from the clip. The video automatically adjusts, creating seamless cuts.
Splitting Blocks: Position the playhead at the desired split point within a text block, then use the split tool to divide one segment into two independent blocks that can be edited separately.
Text Editing: Click directly on any text within a block to correct transcription errors, adjust phrasing, or fix misspelled names. These changes update the subtitle display but don’t alter the actual spoken audio.
Enhancing Your Clip
Editing and Styling Captions
Click the “Subtitles” toggle in the right panel to enable or disable burned-in captions. When enabled, additional styling options appear allowing customization of subtitle appearance.
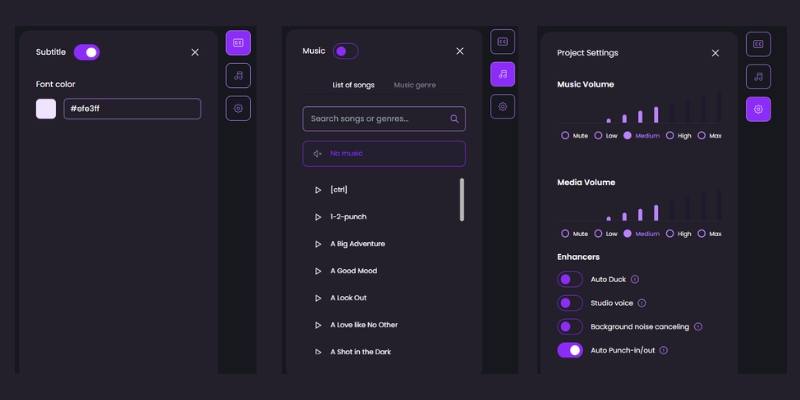
Font and Size: Select from multiple font families including Arial, Helvetica, Montserrat, Roboto, and Impact. Adjust font size to ensure readability on mobile devices (recommended 24-32pt for vertical videos).
Note: Free users can only modify the font color.
Color Customization: Choose text color and background color/opacity to match brand guidelines or ensure readability against video backgrounds. High contrast combinations (white text on black background or yellow text on dark backgrounds) perform best.
Position and Alignment: Place subtitles at the top, center, or bottom of the frame. For vertical videos (TikTok/Reels), center or upper positioning prevents captions from being obscured by platform UI elements.
Animation Effects: Add entrance animations like fade-in, slide-up, or typewriter effects to make captions more engaging and attention-grabbing.
Adding and Adjusting Background Music
Toggle the “Music” switch in the right panel to enable or disable background music. When enabled, Wisecut’s AI automatically selects a royalty-free track matched to the video’s mood from its library of 500+ pre-cleared songs.
Changing Music Selection: Click the music icon to browse alternative tracks. Preview each option before applying to ensure proper mood alignment. All tracks are copyright-free and safe for YouTube monetization.
Volume Control: Adjust the music volume slider (recommended 15-25% to avoid overwhelming dialogue). The AI applies automatic audio ducking that lowers music during speech regardless of volume setting.
Removing Music: Toggle the music switch off to export silent clips. This is useful when planning to add custom licensed music in post-production or when platform algorithms favor native audio.
Audio Enhancement Options
Background Noise Removal: Toggle this option to eliminate ambient sounds like air conditioning hum, traffic noise, or room echo. The AI preserves vocal clarity while suppressing unwanted audio.
Audio Enhancement: Enable this setting to apply professional-grade audio processing that makes dialogue sound like it was recorded in a broadcast studio. The enhancement normalizes volume levels, adds warmth, and improves overall audio quality.
Audio Ducking: This feature automatically lowers background music volume when speech is detected and raises it during pauses, creating professional audio balance without manual keyframe editing.
Auto Punch In/Out Zoom
Enable “Auto Punch In and Out” to have Wisecut automatically detect your face and apply dynamic zooming that creates visual interest and maintains viewer engagement. The AI zooms in during active speaking and zooms out during pauses or scene transitions.
This feature works best with single-speaker talking-head videos shot in 16:9 format. Multi-person content or videos without clear facial recognition may produce inconsistent results.
Previewing and Exporting Your Clip
Preview Before Export
Before committing to final export (which consumes processing minutes from subscription limits), thoroughly preview the edited clip using the built-in player. Click the play button in the video preview panel to watch the complete clip with all enhancements applied.
Full Playback Review: Watch the entire clip start to finish, checking for unintended cuts, caption accuracy, music volume balance, and overall pacing.
Mobile Preview Mode: If targeting mobile platforms (TikTok, Instagram Reels), view how content displays on smartphone screens to catch text legibility issues and framing problems invisible on desktop monitors.
Export Settings and Options
When satisfied with the preview, click the “Export” button to access final export settings with multiple format and quality options.

Aspect Ratio Selection:
- Vertical (9:16): Optimized for TikTok, Instagram Reels, YouTube Shorts, and Facebook Stories
- Horizontal (16:9): Standard YouTube videos, website embeds, and traditional platforms
- Square (1:1): Instagram feed posts, Facebook posts, and LinkedIn video content
Resolution Options:
- 360p (HD): Available on Free plan with watermark, suitable for testing
- 720p , 1080p (Full HD): Available on Starter+ and Professional plans, recommended standard for professional use
- 4K (Ultra HD): Available on Professional+ plan only, required for premium quality
Final Toggles:
- Burned-in Captions: Enable to permanently embed subtitles into the video file
- Background Music: Confirm whether to include the selected soundtrack
- Watermark: Free plan exports include Wisecut branding; paid plans export clean videos
Downloading and Sharing
After clicking “Export,” Wisecut adds the clip to the processing queue. Export processing typically takes 1-3 minutes depending on clip length and selected quality.
Direct Download: Once processing completes, click “Download” to save the MP4 file to your local device. Organize downloads into project-specific folders for easy retrieval.
Direct Sharing: Professional+ plans offer one-click sharing to connected social media accounts including YouTube, Instagram, Twitter, and Facebook without downloading locally first.
Project Storage: Downloaded videos are permanently saved, but the ability to re-edit clips within Wisecut expires after 30 days on most plans. Download final exports promptly or maintain active subscriptions for ongoing access.
Compare Wisecut’s export options and quality to other AI editors in our best AI video editors comparison.
Pro Tips & Common Troubleshooting
Best Practices to Maximize Results
Batch Processing Strategy: Upload and process multiple videos during off-hours (overnight or during lunch breaks) to maximize productivity. Queue several projects simultaneously and let email notifications alert you when all processing completes.
Content Optimization Before Upload: Record with Wisecut in mind: use external microphones for clear audio, maintain consistent speaking pace and energy, keep subjects centered in frame for auto-punch effectiveness, and avoid monotone delivery that makes all segments appear equally important to the AI.
Strategic Clip Selection: Review all generated clips in the “All Clips” section before settling on the AI’s Highlight selections. The algorithm is 85-90% accurate, but human judgment still adds value for brand-specific priorities.
Keyword Search Mastery: Use specific technical terms, product names, or topic keywords in the search function to instantly locate relevant segments in large clip libraries from lengthy source videos.
Template Consistency: After finding optimal settings (caption style, music preference, zoom effects), replicate these across all projects to maintain brand consistency and reduce decision fatigue.
Common Issues and Quick Fixes
Problem: Upload Fails or Freezes
Causes: File size exceeds plan limits, unsupported codec, unstable internet connection, or YouTube link permission issues.
Solutions: Verify file size is under plan cap (2GB Free, 4GB Starter, 5GB Professional). For YouTube links, ensure the video is public or unlisted (not private). Convert videos to H.264 MP4 format using free tools like HandBrake before uploading. Test internet connection stability and pause bandwidth-intensive applications during upload.
Problem: AI Highlights Miss Important Moments
Causes: Monotone delivery, technical content without emotional peaks, or quiet speaking segments.
Solutions: Don’t rely solely on the Highlights section. Browse the “All Clips” section using keyword search to find specific topics or segments. The AI optimizes for engagement patterns, but domain expertise beats algorithms for niche content.
Problem: Transcription Errors or Inaccurate Captions
Causes: Background noise, heavy accents, overlapping speakers, technical jargon, or poor audio quality.
Solutions: Edit captions directly in the storyboard by clicking text blocks and making corrections. Changes sync automatically to subtitle display. Re-record in quieter environments when possible for future projects.
Problem: Processing Takes Longer Than Expected
Causes: Server congestion during peak hours (weekday mornings 9-11 AM), very large files, or complex audio with multiple speakers.
Solutions: Processing typically completes within 2-4 minutes per 10 minutes of source video. If significantly delayed, processing continues server-side—close the browser and await email notification. Upload during off-peak hours (evenings, weekends) for faster processing.
Problem: Auto-Reframe Crops Faces Incorrectly
Causes: Multiple faces in frame, subjects moving outside center, or rapid camera movement.
Solutions: Disable Auto Punch In/Out for multi-person scenes. Record single-speaker content with subjects centered in frame for best results. Choose original 16:9 horizontal format for content with complex framing.
Pro Tip: Before processing a 60+ minute video, test Wisecut with a 5-10 minute segment first. This reveals transcription accuracy, AI selection preferences, and audio quality without investing full processing time or subscription minutes. Adjust recording practices based on results before processing complete content.
When to Use Wisecut vs Manual Editing
Use Wisecut When:
- Content is primarily speech-based (interviews, podcasts, vlogs, webinars, testimonials)
- Time efficiency is the top priority over frame-perfect creative control
- Creating social media clips from long-form source material
- Generating high volumes of content on consistent schedules
- Working with straightforward talking-head footage
Switch to Manual Editors (Premiere, DaVinci, Descript) When:
- Content requires precise frame-level timing (comedy, dramatic pauses)
- Multiple camera angles need specific creative switching points
- Advanced effects like overlays, motion graphics, or animations are required
- Narrative storytelling demands artistic shot selection
- Music videos or non-speech content needs editing
For complex projects requiring more control, compare Wisecut vs Descript to determine which platform better suits your needs.
Frequently Asked Questions
How long does Wisecut take to process videos in 2025?
Processing averages 2-4 minutes per 10 minutes of source video in the updated 2025 workflow. A 60-minute video typically processes in 12-18 minutes, while a 20-minute video takes 4-8 minutes. Processing speed depends on video resolution, audio complexity, server load, and time of day.
Can I edit clips after initial export?
Yes, as long as the project hasn’t expired (30 days for most plans). Return to the project from your library, access the clip from All Clips or Highlights section, make additional edits, and re-export. However, this consumes additional processing minutes from your subscription allocation.
What’s the difference between Highlights, All Clips, and Full Content?
Highlights shows the AI’s top three clips under 59 seconds optimized for social media. All Clips displays every segment generated from your video (typically 5-50+ clips). Full Content is your complete original video with AI enhancements applied (silence removal, music, captions) but no clip extraction.
Does Wisecut work with non-English languages?
Yes, Wisecut supports transcription and caption generation in 40+ languages including Spanish, French, German, Portuguese, Italian, Mandarin, Japanese, Korean, Hindi, and Arabic. Caption accuracy varies by language, typically 85-95% for major languages with clear audio.
Can I use my own music instead of Wisecut’s library?
The 2025 version focuses on Wisecut’s 500+ royalty-free music library for copyright safety and YouTube monetization compliance. For custom music, disable the music toggle during export and add licensed tracks in post-production using traditional editors.
What happens if I run out of processing minutes?
Projects can be uploaded and queued but won’t process until the next billing cycle renews your minutes or after upgrading plans. Already-exported videos remain accessible permanently regardless of subscription status.
Does Wisecut have a mobile app?
Yes, Wisecut offers mobile apps for iOS and Android with basic functionality. However, the web browser version provides the complete feature set and better storyboard editing experience on larger screens.
Related Guides & Resources
For comprehensive mastery of Wisecut and AI video editing, explore these related resources:
- Complete Wisecut AI Review 2025: Features, Pricing & Performance – Detailed evaluation comparing Wisecut’s capabilities, pricing tiers, pros and cons against competitors with hands-on testing results
- Wisecut vs Descript: Which AI Video Editor Wins in 2025? – Feature-by-feature comparison helping creators choose between automation-focused Wisecut and control-focused Descript based on specific workflow needs
- Best AI Text-to-Video Tools in 2025 – Expert review of 7 best AI text-to-video tools in 2025. Compare Pictory, Synthesia, RunwayML, HeyGen and more with real testing.
- Descript Full Review: Features & Pricing Guide – In-depth analysis of Wisecut’s primary competitor
VIDEO – COMPLETE TUTORIAL
Conclusion: Master Wisecut’s 2025 Workflow
Wisecut’s refined 2025 interface transforms video editing from a time-consuming technical challenge into a streamlined three-step process: upload your video, let AI generate clips automatically, and export the best segments—all in under 15 minutes for most projects. By following this step-by-step guide, beginners can achieve professional editing results 85-90% faster than traditional manual editing workflows.
The platform’s simplified workflow with automatic Highlights selection, comprehensive All Clips library, and enhanced Full Content option eliminates technical barriers while maintaining output quality suitable for professional use across social media platforms. The storyboard interface removes the need to understand complex timeline editing, making video production accessible to creators of all skill levels.
Success with Wisecut depends on understanding its core strength—automated clip generation from speech-heavy content—while working within its limitations through proper source material preparation (clear audio, centered subjects, dynamic delivery) and strategic manual refinement of AI-generated results when domain expertise demands human judgment.
Ready to compare Wisecut against alternatives? Read our comprehensive Wisecut AI review with pricing analysis, performance benchmarks, and competitor comparisons to make an informed decision.
Start your free Wisecut account today at wisecut.ai to experience the 2025 automated video editing workflow firsthand with 1 hour of complimentary processing time.